August 1, 2021
Eggplant & Zucchini Green Curry
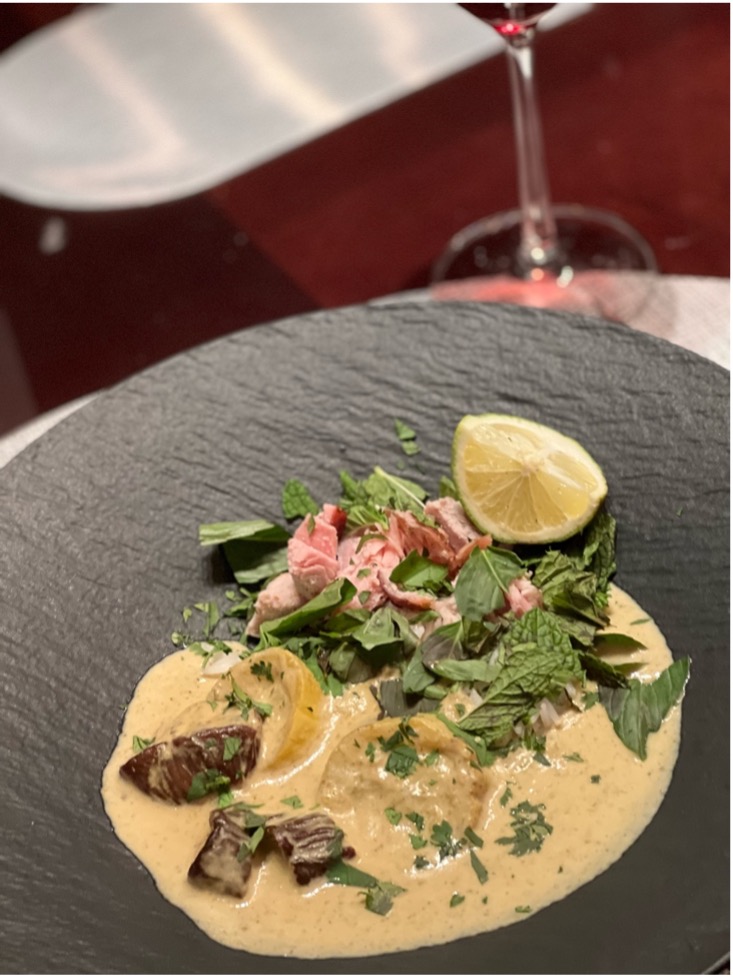
This curry is wonderful, decadent, and is a vegetarian recipe that can easily be customized for almost any land or sea protein, including, shrimp, chicken, or pork. If you’re not one for vegetables and only want to add meat, you can simply omit the vegetables. For a party we recently had, we served this curry with smoked pork shoulder and coconut jasmine rice. As a word of caution, this green curry is about medium/hot spice and isn’t spicy on the onset but one that gradually builds so be prepared with an icy cold one. You can also make this curry a day in advance and the flavors are even better the next day.
 Coconut milk, coconut cream, and green curry paste. From left to right, ginger pieces, chopped lemongrass, and chopped garlic
 Handful of lump sugar
 Frying the curry - the texture and color has changed and ready for the addition of the coconut milk
 Slowly incorporating coconut milk into the curry paste
 eggplant roasting in the oven
 eggplant after roasting
 Curry after the addition of the eggplant
Eggplant & Zucchini Green Curry
- Yield: 10 Generous Servings
- Prep: 30 Minutes
- Total: 90 Minutes
Ingredients
Equipment
The Methodology
- Preheat the oven to 350 and line your sheet tray with foil (Costco has these amazing foil sheets which I am in love with) and spray the foil with olive oil spray/Pam
- b. Cut the eggplant into roughly 1 inch length discs and throw discs into large mixing bowl and add about 4 tbsp of olive oil (or enough olive oil to coat the eggplant) then season with 2 tbsp of fine salt. Place discs on the sheet tray and bake for 35 minutes or until the eggplant is slightly browned and kind of wrinkly. While the eggplant is roasting in the oven you can start preparing the curry (once the eggplant is done, take it out of the oven and set it aside)
- Turn your burner on and get your pot to about low to medium heat (not too hot). Add 3 tbsp of olive oil and add the cans of green curry paste and fry it until the paste gets some color and you see that it is starting to thicken and lose some moisture (this should take about 5 minutes). Make sure to keep stirring so the curry paste doesn’t burn. As a word of caution, this stage in the recipe can get odoriferous so turn on your overhead fan and take care not to breathe too deeply as you will undoubtedly begin to sneeze profusely.
- Once the curry paste has been cooking and you see that the texture is starting to change a little bit, add the lemongrass and garlic cloves and cook for another 3 minutes. If you are adding land animal protein to your curry, this is the time to add either cut up seasoned chicken or pork (if adding shrimp I would add it further on in cooking process) and remove the large chunks of ginger).
- Slowly add one can of coconut milk and taking care to scrap off all of the bits at the bottom and incorporating everything together. Add the remainder of the cans of coconut milk and the can of coconut cream and stir to incorporate. Add the sugar and the fish sauce and bring to a boil and turn the heat to low and simmer the curry for 30 minutes. At this point, you can add the roasted eggplant, raw zucchini (if adding vegetables), and pesto and simmer for another 30 minutes (if you are adding shrimp to this recipe, I would add the shrimp 15 minutes into this 30 minute simmer period to make sure that the shrimp is not overcooked). This curry can be made a day in advance which provides an even better flavor.
Wine Pairing

We served this with coconut jasmine rice and the best, easiest recipe I found is here: Fluffy Coconut Rice Garnish the curry with chopped cilantro, Thai basil, mint and wedges of lime. The curry was paired with Russian River Valley that we found at Costco which was a great wine score.
August 23, 2021
Watermelon & Corn Salad
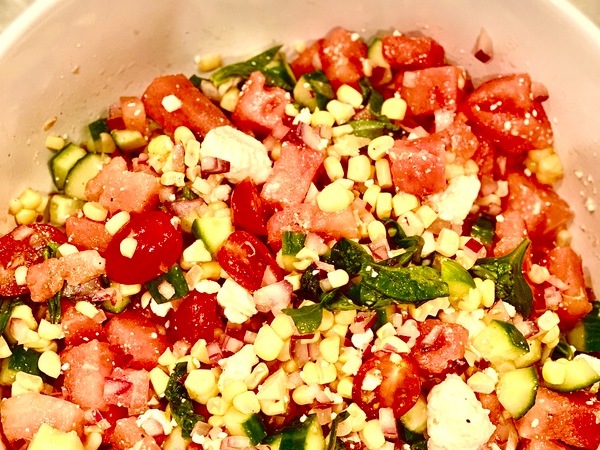
Summer is drawing to a close but there is still time left to make this delicious dish that utilizes the ingredients of the summer season. This salad can be prepared an hour in advance and only requires the addition of the dressing right before serving. The watermelon and corn salad is a perfect side dish to any barbeque or pool party and a great accompaniment for rich dishes such as smoked ribs, burgers, or any hearty protein that could use some sweetness and acidity. For this salad, I would highly recommend buying fresh, whole ingredients and cutting the ingredients yourself as the beauty of this salad is derived from the freshness and quality of the ingredients used in the preparation. Although, I did not use mint in this particular recipe, if you have an abundance of mint, you can also throw it into the salad as a welcome addition.
 Ingredients used for this salad
 De-seeded the cucumber
 Roughly chopped the cucumbers lengthwise and then diced
 Diced red onion - a very rough chop. Don't let your OCD let it get the best of you!
 The finished product before the addition of the dressing.
Watermelon & Corn Salad
- Yield: 4 Servings
- Prep: 30 Minutes
- Total: 45 Minutes
Ingredients
Equipment
The Methodology
- Fill your large pot to about halfway with warm water and place on the stove and crank up the heat to high. Add your two ears of corn and cook the corn for about 15 minutes (the corn should be ready when the water is just about to start bubbling away). You don't have to be precise about the 15 minute cook time but you should be able to to tell when that the corn is ready when the kernels are plump. While the corn is cooking, you can prepare the rest of the ingredients for the salad.
- Cut the cucumber in half length-wise and de-seed using a spoon to scoop out the seeds and spongy stuff in the middle (this is all extra moisture that will make your salad soggy). Cut the cucumber halves lengthwise to make several strips and then dice and add to the large serving bowl.
- Take 3/4 cup of grape tomatoes and cut each tomato into halves and then place in the serving bowl.
- Dice 1 cup of red onion and add to the serving bowl.
- Cut 4 cups of watermelon into 1/2 inch cubes and add to the serving bowl. If you have never cut your own watermelon before, I highly encourage you to do so because not only does it taste fresher, it's also a fraction of the cost compared to store cut watermelon. I suggest buying seedless watermelon so you can save yourself the trouble of de-seeding the watermelon as well.
- In the pyrex measuring cup (or drinking glass if you don't have a pyrex), add 4 tbsp of olive oil and 1/4 cup of red wine vinegar and whisk until it is well blended. If you're making the salad ahead of time, you can pack the dressing into a separate container and add to the salad right before you're about to serve.
- By now, your corn should be ready, take the pot off the stove, and drain the hot water. Turn the faucet to cold water and add cold water to the pot to cool down the corn. Alternatively, if you have some time on your hands, you can just remove the corn with some tongs and just let it sit on a plate for it to cool down for ten minutes but if you're impatient like me, you'll want to just rinse it a few times with cold water to quickly cool it down.
- Back to the serving bowl - you will want to rip the basil leaves by hand and add it to the serving bowl. Now, crumble the feta cheese by hand and also add it to the serving bowl (I like really big chunks of feta cheese but if you want to make them smaller or use store bought feta crumbles that is fine too).
- Hopefully by now your corn has cooled off so you can begin removing the kernels from the cob. . . make sure that the base of the cob is flat (chop off the bottom of the corn if it isn't) and place a kitchen towel in between the bottom of the cob and the cutting board. Next, grip the top part of the cob and take your knife and cut from the top of the cob to the bottom in one chop, taking care to get as close to the cob as possible to strip off all of the kernels. Keep doing this until all of the kernels are removed; repeat this step with the second ear of corn. Be careful during this step! If you do not wish to live dangerously like me, I found this recipe that calls for using a bundt pan to stabilize the corn and catch the corn kernels during this kernel removing process: Easy Tip for Getting Corn Off the Cob
- Add the corn to the salad and voila you're done! At this juncture, you can saran wrap your salad and bring it to your labor day party and just add the dressing and 2tsp of salt and 1/2 tsp of black pepper (you can always adjust the seasoning to taste) right before serving. Remember to stir the dressing and seasoning so everything is well incorporated but taking care not to damage the watermelon or break up the feta.
January 23, 2021
Air Fried Korean Chicken & Cabbage Slaw
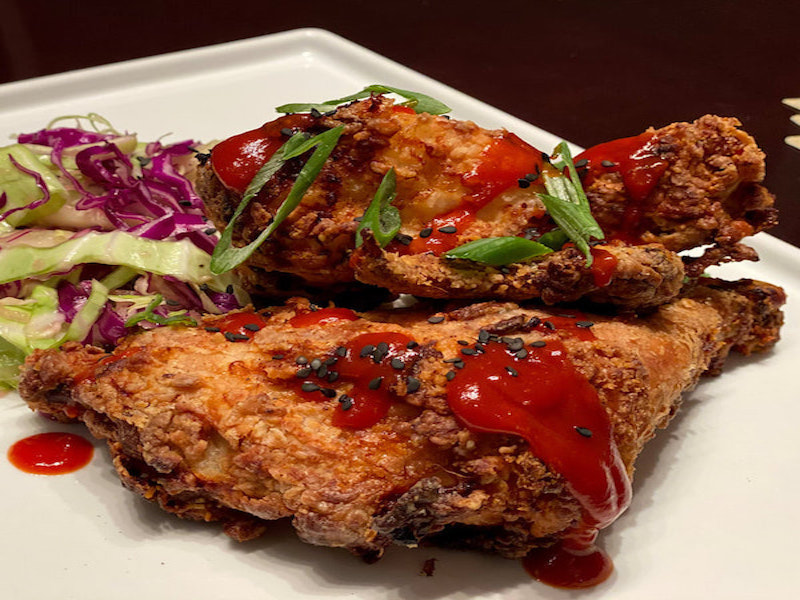
Just like everyone, we love fried chicken but not necessarily the calories. This Korean fried chicken recipe is easy to make and does not create a huge mess like your standard fried chicken recipes. It is best to marinate the chicken ahead of time so prepare this dish in advance. The fried chicken is not spicy but does have a bold flavor thanks to the Korean red pepper paste so you would want to pair this with a low tannin red.
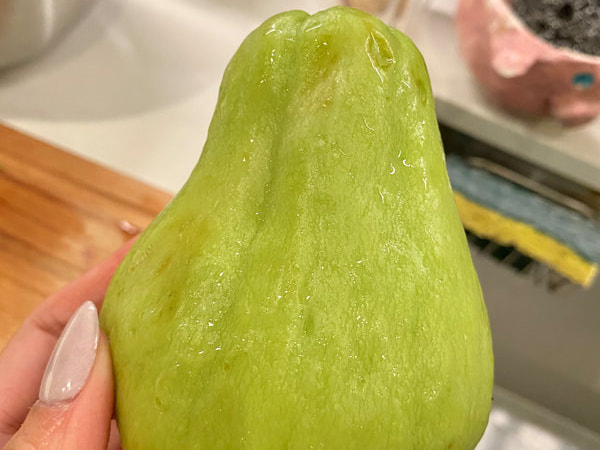 Chayote Squash
 Gochujang Paste
 Chicken in the marinade
 Dredged chicken with spray before it goes into the air fryer
 Chicken after 2 rounds in the air fryer (15 minute on each side)
 The finished product
Air Fried Korean Chicken & Cabbage Slaw
- Yield: 4 Servings
- Prep: 60 Minutes
- Total: 90 Minutes
Ingredients
The Methodology
- Break down the whole chicken into two wings, two thighs, and 4 pieces of breast (alternatively, you can just buy a whole cut up chicken from the grocery store which is way easier). Set aside the chicken.
- Caution: this next step may cause you to tear up so you will want to do this fast, unless you have terrible vision like me and contacts somehow deflect the onion’s powers. Peel a whole onion and cut off the top of the onion and grate from that end taking care not to grate your fingers. Grate the whole thing on the largest grate setting on the box grater and grate everything (including that onion juice) into a large rubber container large enough to fit the chicken pieces. Add the fish sauce, salt, pepper, and water to the container with the onion pulp.
- Take your chicken pieces and place them in the container with the marinade and making sure the chicken is well coated with the marinade. You can let the chicken marinade in the fridge anywhere from 1hr – 8 hrs. I made this marinade in the morning and prepared the rest of the dish after getting home from work.
- Grab a gallon size ziplock bag and add the corn starch, flour, and seasonings and make sure to combine thoroughly.
- I used the instant pot 8 qt duo with air fryer lid. Link for the Instant Pot Plug in the air fryer and remove the basket and set aside. My air fryer is a bit on the small side and can only fit 3 pieces of chicken at a time (1 wing, 1 breast, and 1 thigh) so this recipe wouldn’t take nearly as long as if you have a larger air fryer as you would not need to do as many batches. Alternatively, you can also try making this recipe in a convection oven if you don’t have an air fryer.
- Grab a piece of chicken from the marinade and shake off any excess marinade and place into the ziplock bag. Close the bag and shake the piece of chicken around in the bag so the chicken is evenly coated. Remove the piece of chicken and shake off any extra dusting and place into the air fryer basket. Repeat with other pieces of chicken to fill the basket.
- Once your basket is full, generously spray the chicken with avocado oil spray or canola oil spray so the pieces are evenly coated. Place the basket in the air fryer and air fry at 400F for 15 mins. Open up the air fryer and flip the pieces over and air fry at 400F for another 15 mins. Each side should be golden brown and place in the oven under warm while you’re air frying the other batches (I place the chicken on a wire rack to preserve the texture of the chicken while it’s in the oven).
- Repeat steps 3 and 4 with the other batches of chicken and air fry until all the chicken is air fried. You can keep air fried pieces in the oven while you’re finish up all the batches or if you’re busy preparing other side dishes for dinner.
- You can prepare the cabbage slaw while you’re waiting on the first batch of chicken and just adding the dressing minutes before you’re about to serve everything.
- You can make this sauce in advance and warm it up before serving or you can start working on this before you start the chicken dredging/frying process.
- Grab a sauce pan and combine all the ingredients and put on the stove on low heat. Stir periodically to ensure that the sauce doesn’t bubble too much and to warm the ingredients together.
- Use a mandolin on the 3/16 setting to slice the cabbage or use a knife to thinly slice the green and red cabbage. Add the cabbage to a bowl.
- Optional: cut the chayote squash in half and remove the core piece. Thinly slice the chayote so the pieces look like matchstick like pieces and add to the bowl with the cabbage. Chayote squash has a great crunchy texture and has a similar taste to a pear so if you do not have chayote squash, adding apple or pear would be a great substitute. Note: you can shred the cabbage hours in advance as there will be very little browning or discoloration in the cabbage but if you want to add the chayote squash or apple or pear, you will want to do this right before serving the entire dish as those items will discolor.
- Grab another small bowl or Pyrex measuring cup, and add the lime juice (if you don’t have a lime juicer you can cut the lime in half and use a fork to juice it, I would suggest using fresh lime juice versus lime concentrate), minced ginger (I used prepared ginger), fish sauce, and agave to the bowl. Stir everything together. Thinly slice half of a shallot (so they look like thin rings) and add the shallot to the dressing.
- Reserve the dressing and add to the cabbage right before serving as adding it too far in advance will cause the cabbage to lose its crunchy texture. Toss the dressing in the cabbage mixture making sure everything is evenly coated.
- Grab the chicken from the oven. Plate the dressed slaw on the side and add the piece(s) of chicken and drizzle the sauce on the chicken. Garnish with sesame seeds and scallions.
Wine Pairing
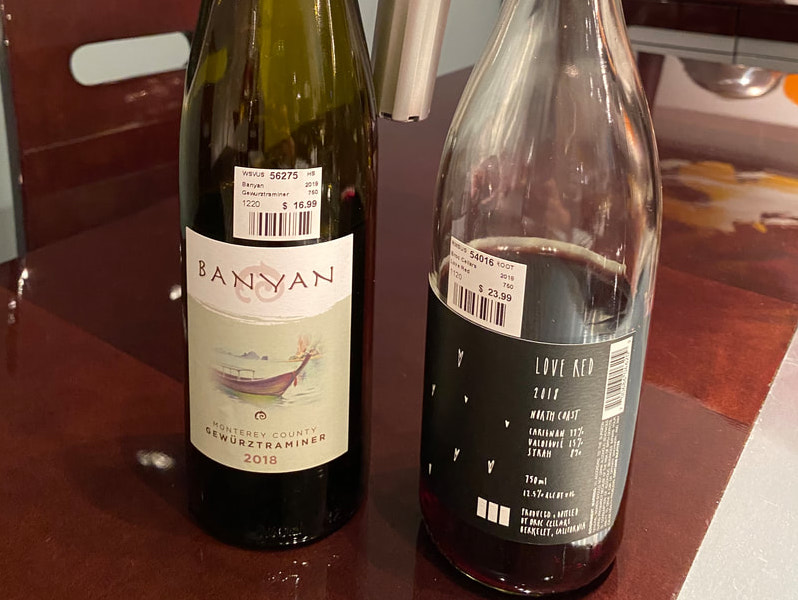
Because of the Asian flavors and spice of this dish, the best wine pairing is a Gewurztraminer. I found a California Gewurztraminer that was very fruit forward (hints of pear and honey) that was not sweet. If you’re feeling red, we also paired a low acid, low tannin red blend from California with this dish.
January 17, 2021
Beef Burgundy
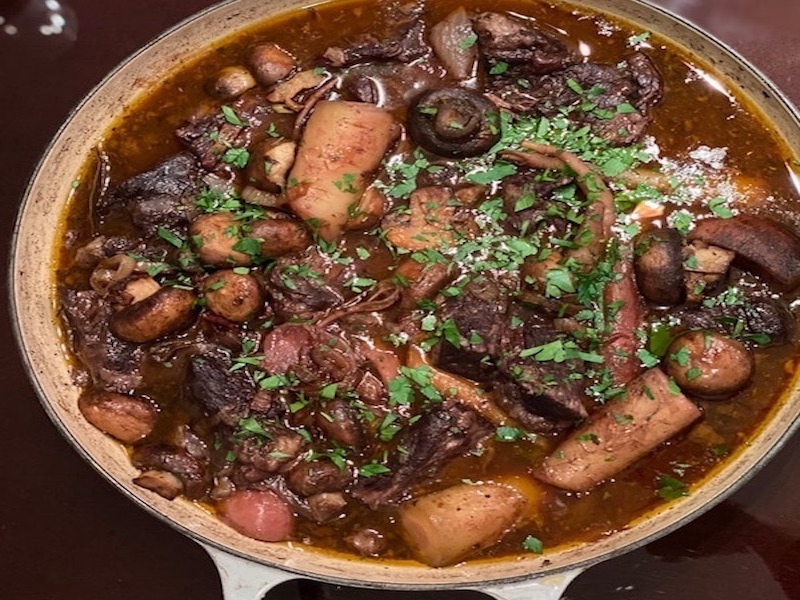
A favorite of mine during the cold winter months. This recipe uses local vegetables and very little ingredients. This dish does take a while to braise but you can get this going and go relax with a glass of wine (or a few) while the beef is braising. A couple of things worth mentioning:
- You will want to select a beef roast that has decent marbling and connective tissue such as a chuck roast. Definitely stay away from sirloin or some other lean meat (and also those pre-cut stew chunks you see at the grocery store).
- Using really fancy wine is not necessary, nor do you even need to use a burgundy in this dish. I used random leftover reds and a $3.99 merlot from Whole Foods which worked just as well.
- This dish can be served with any type of starch you would like - you can serve it over mashed potatoes or egg noodles. I usually just serve it in a bowl with some crusty bread.
- I used a le creuset braiser to make this one pot dish, but you can use a Dutch oven or cast iron.
 Root vegetables: local radish & carrots (you can use carrots and parsnips as an alternative)
 Chuck roast cut & seasoned with salt and pepper before searing
 The booze line up: cognac & the selection of leftover wines to braise.
 Sautéing vegetables before the addition of the cognac.
 Marbling and fat (aka deliciousness) in this chuck roast
 The stew before the final step of braising.
Beef Burgundy
- Yield: 8 generous servings
- Prep: 40 minutes
- Total: 3.5 Hours
Ingredients
The Methodology
- Let the chuck roast come close to room temperature and cut it into 2-3 large chunks. Grab a paper towel and pat down the meat and season generously with salt and pepper (roughly 2-3 tbsp of each).
- Lightly sear the chuck roast pieces with about 1 tsp of olive oil (I used the medium heat setting on the gas stove) and set aside in a bowl after you’re done searing.
- Now add the carrots, radishes, and onion to the pot and sautée them with about 1 tsp of butter and a tsp of salt and pepper, keeping the heat on medium or turn it down if it’s getting too hot. After the vegetables get some good color, add the cognac and scrap all the brown bits in the bottom of the pot and incorporate into the cognac and the vegetables. Cook until the cognac evaporates.
- Meanwhile the vegetables are cooking with the cognac, cut the roast pieces into smaller pieces (about 2 inch pieces).
- Once the cognac is cooked down, add the pieces of chuck roast, tomato paste, bay leaves, herbes de provence, mushroom seasoning/beef bouillon, and red wine. Add enough red wine to almost cover the beef. Let the stew come to a soft boil, put the lid on, and turn the heat down to medium low (do not let the stew come to a boil but rather a simmer; low and slow is the key here). The process of braising the vegetables and beef will take anywhere from 2-3 hours; if you’re in a rush you can always crank up the heat but I would advise against that.
- I periodically check on the stew every 30-45 minutes to make sure that the stew isn’t boiling over or going crazy and poke at the pieces to check on the tenderness; you’re looking for something that is tender but not exactly falling apart. You will alo want to taste the broth to ensure that it is seasoned properly; if you feel it needs more salt, add more mushroom seasoning or beef bouillon in 1 tsp increments. When the beef is close to being done, you’ll need to get started on the mushroom/onion garnish. Grab a frying pan and turn the heat to medium. Then you will take your slice of bacon and slice them into match stick like pieces and add them to the frying pan (make sure the bacon doesn’t burn). Add the mushrooms (slice the larger ones in half) and the pearl onions to the bacon and cook for about 10 minutes or until the mushrooms are golden and the onions are soft but still have some texture.
- Once your beef is done braising add the bacon/mushroom/onion mix to the stew and voilà your’e done! Garnish with some parsley and serve with some crusty bread or over some mashed potatoes.
Wine Pairing

Although not pictured, this dish was served with a Gigondas from Famille Perrin. If you’re unable to find a Gigondas, I think any wine from the Rhône valley will be suitable.
October 26, 2020
Chicken & Shrimp Paella
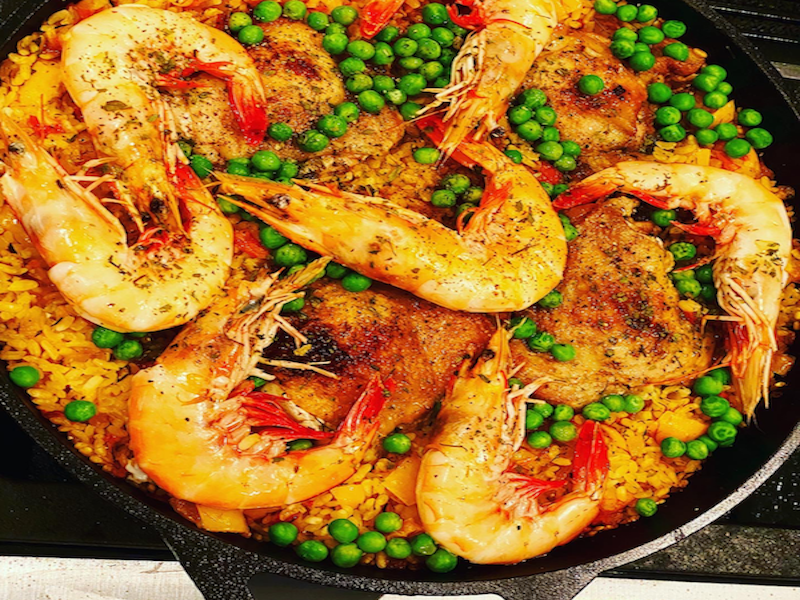
This recipe serves 4 and approximate cook and prep time is 1.5 hrs - the beauty of this dish is the rice does not need any tending while it’s doing its magic. Shrimp is optional, if you just want to make chicken paella, you can omit the shrimp.
 Chicken should look like this when you’re done searing
 All the veg
 Sautéed with the thyme, paprika, salt, and pepper
 This is what the dish should look like right before you put the lid on it
Chicken & Shrimp Paella
- Yield: 4 Servings
- Prep: 30 Minutes
- Total: 90 Minutes
Ingredients
The Methodology
- Prepare your cast iron pan by cranking the heat to medium and allow the pan to warm up for about 5 minutes, or until the pan feels hot.
- While the pan is heating, pat the chicken thighs til dry with a paper towel and season with 1 tbsp each of salt, pepper, and paprika on each side of the thigh.
- Once the pan is hot, add 2 tbsp of olive oil to the pan and add the chicken thighs skin side down and sear until golden brown (approximately 6 minutes on each side). Please refer to the photo to the right, the skin should be crispy and not sticking to the pan and golden brown.
- Remove the chicken thighs and set aside in a bowl and add the bell peppers, onions, tomato, and 1 tbsp of paprika and thyme and the heavy pinch of saffron and 2 tbsp of salt and 1/2 tbsp of pepper.
- Cook the vegetable mixture for about 7 minutes until the peppers are slightly cooked but still have some texture.
- Add the paella rice along with the 1/3 cup of wine and reduce for 3 minutes and then add your chicken stock. Stir the rice mixture so everything is evenly incorporated.
- Remember the chicken thighs? Bring them back and nestle them into the rice mixture (skin side up) and cook under medium low heat for about 30 minutes with the lid on.
Wine Pairing
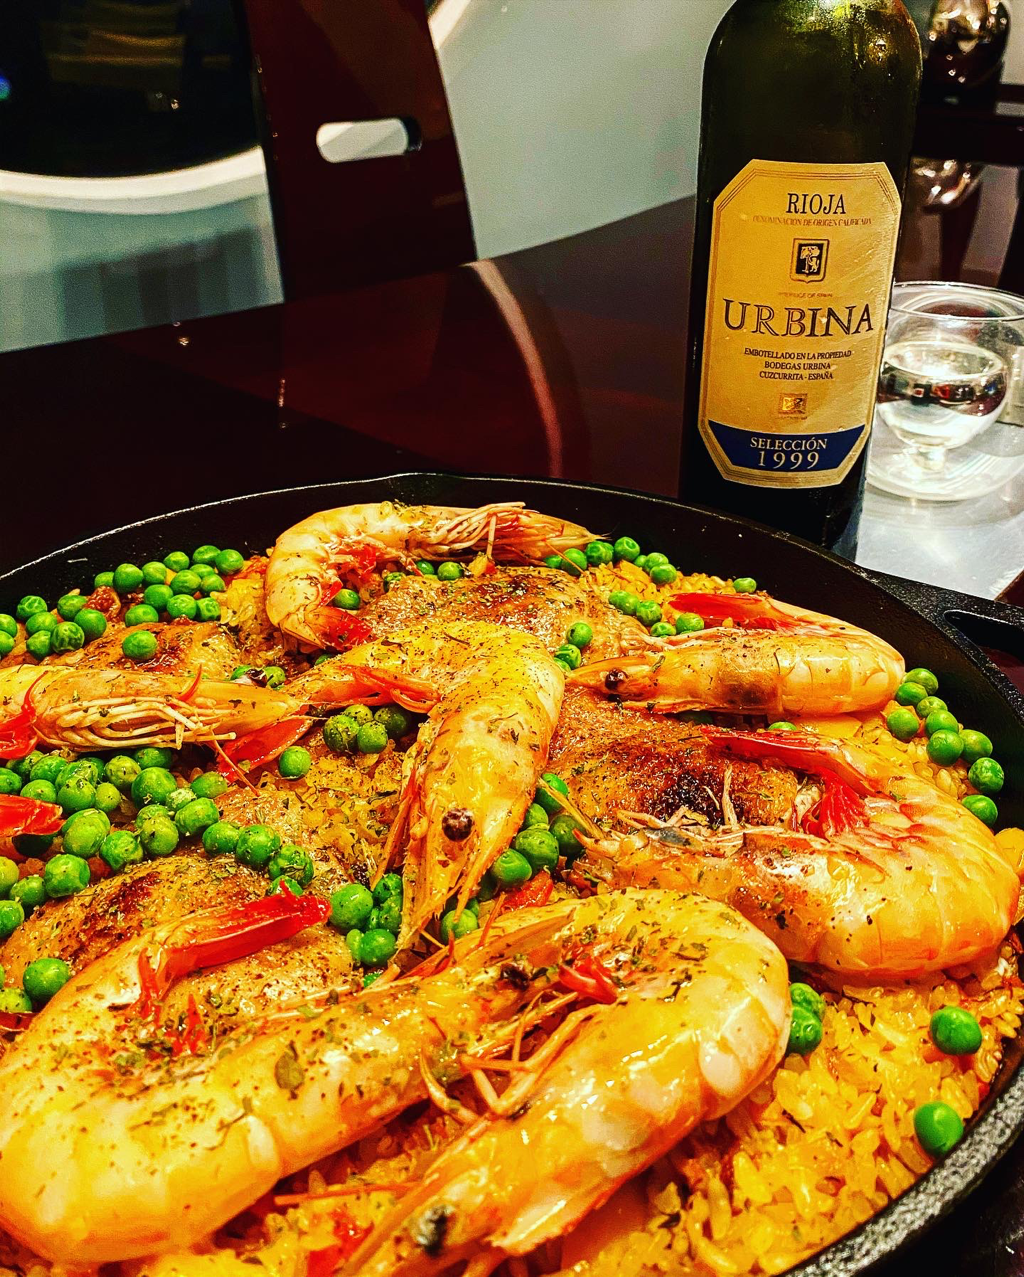
Since the paella is both poultry and seafood and originated in Spain, I decided to pair it with a Rioja that I picked up from Costco (bottle was a steal at $19.99) and paired exceeding well. This wine will benefit from allowing it to breathe for a bit longer since it is a 1999 and made with Tempranillo grapes. Had this been a seafood paella only, I would chosen a lighter red as this one is a little full bodied for only seafood.
October 31, 2020
Smoked Beer Can Chicken w/ Friends
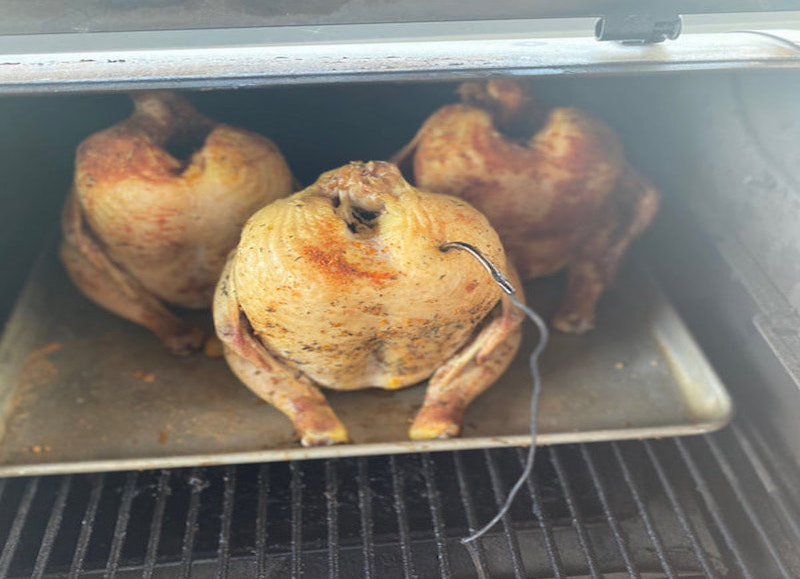
Every year my best friends (coincidentally also bankruptcy attorneys) and I put together this event called Meat Fest since we always buy an obscene amount of meat - last year was a whole steer and the previous year was one lamb and one goat and this year it was 30 chickens and the "gourmet pig package". We're not actually gluttons, we're just really supporting our friend Sean in moving up through the rungs of the Houston Live Stock Rodeo. We were very hopeful that Meat Fest 2020 would be unscathed from COVID19 but unfortunately we were not able to put on our epic display of gluttony in person so we decided to do it virtually. While not exactly the same, it was still amazing to be together and to cook together. Here are the recipes that we used and some snippets from our virtual cookoff:
 Stuffed jalapenos prior to smoking
 Glazing the pork belly with the char siu sauce
 Chopping pork belly for the "meat cam" during virtual Meat Fest
 Ready for the grill
 I'm ready for my closeup
 Albert's Chicken
 Like his page
 We also had oysters home shucked from a'Bouzy and...
 a delicious charcuterie board with our smoked pork belly and homemade pate.
Smoked Beer Can Chicken w/ Friends
- Yield: A lot
- Prep: 60 Minutes
- Total: 180 Minutes
Ingredients
The Methodology
- Score the pork belly (fat side) at a 45 degree angle so you have a diamond pattern and score to about a 1 inch incision (be careful not to cut through the whole pork belly)
- Season the pork belly with salt first and then the coffee rub
- Smoke the pork belly at 225F until it reaches 150F and then remove and baste it with the sauce and wrap it
- Smoke until the pork belly reaches 190F
- Grill or pan sear the pork belly for a nice char on the outside.
- Turn the smoker onto 225F
- Stuff each jalapeno with about 1 tsp of sausage and wrap in bacon and tooth pick to hold bacon ends together
- Place stuffed jalapenos on a baking tray and place in smoker for 1.5 hrs
- Take the chicken and coat it with olive oil or mustard with your hands for an even coating
- Pat the rub onto the chicken and coat evenly
- Insert the ½ can of beer and position the chicken upright on the smoker on a baking sheet) - as you can see from the photo we did 3 at once.
- Smoke the chicken at 225F until it reaches 130F and then crank up the smoker to 400F in order to crisp up the skin and until it reaches a temperature of 155F (I prefer 150F but this may be a bit risque for most, the chicken will continue cooking once it's off the smoker and still steaming as well)
The Feast
We ate the fruits of our labor together. Our friend Albert made his own beer can chicken and twice baked potatoes - we've been cooking/smoking together for years now and even a global pandemic can't break our stride now. He recently started a cooking page on his instagram which you should follow Cooking with Treb He and his lovely wife, Liza, make many delicious meals and healthy to boot.
August 29, 2020
Smoked Asian Pork Spareribs
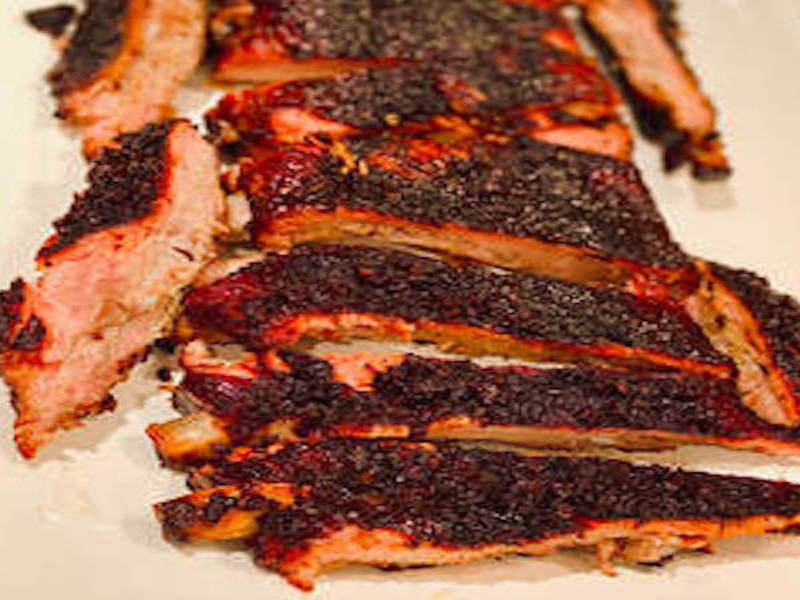
So this may not be the most traditional way to smoke pork spare ribs and maybe even sacrilegious to BBQ buffs but you know what, this recipe definitely works if you want BBQ ribs and you don’t necessarily wait around all day tending to them. Also, full disclosure, but we have a wifi Tragaer which makes smoking meats one thousand times easier because I can monitor the temperature and timing while being outside of the house. This recipe was created out of sheer convenience with little to no sacrifice as to the quality of the product.
Most barbecue recipes from what I’ve seen call for this 3 2 1 method where ribs are smoked for 3 hours unwrapped, then wrapped for 2 hours, and then sauced for 1 hour. This recipe is, let’s say, more of a 3 2 method and instead of smoking and then wrapping them, I did the reverse of smoking them while wrapped at a lower temp, and then unwrapping and saucing simultaneously and turning up the heat to get that nice bark. The sauce I used to glaze the porks for step “2” is a char siu inspired sauce, or Chinese barbecue sauce.
 From left to right: 5 spice powder, Maggi seasoning (it’s a very potent “soy sauce”), shaoxing rice wine, honey, and minced garlic.
 Char Siu Baos
 Char Siu Baos
Smoked Asian Pork Spareribs
- Yield: 1 Rack
- Prep: 60 Minutes
- Total: 6 Hours
Ingredients
The Methodology
- Take the ribs out of the packaging and rinse and pat them dry with a paper towel.
- Coat the ribs with the salt first, and then the rub - measurements do not have to be exact with the rub, you want to ensure that the ribs are properly coated (the coffee rub also is not very salty so you can be fairly liberal with the rub; if you’re not using the coffee rub just make sure you taste your rub to gauge the saltiness level before you go wild).
- Let the ribs marinade in the rub - you can go as little as 30 minutes to as long as 24 hours (obviously the longer you let the ribs sit the better). I marinated the ribs for 24 hours in a ziplock bag and let them on the counter top for 30 minutes before taking them to the smoker.
- \
- Get a sauce pan and turn the heat to about a medium-low and add the olive oil. When the pan is warm add the garlic and stir it around for about 1 minute.
- Add the rice wine, honey, soy sauce, and five spice powder and cook it until the sauce becomes pretty thick, almost like molasses.
- When it reaches the consistency of molasses, turn off the stove. You can make large quantities of this sauce and actually store it in the fridge for a while, it keeps well for quite a few weeks and works well on other meat (e.g. baked chicken, pork tenderloin, etc).
- Set the smoker at 180F and wrap the ribs in aluminium foil and place directly on the grate. I take the smoker’s probe and insert it in between the two ribs (make sure to get the probe in the middle of the rib otherwise the probe may give you an inaccurate reading). Smoke the ribs at 180F for 3 hours and then take the ribs off the smoker and unwrap.
- Turn the smoker up to 225F (if you have a pellet smoker with a “super smoker” option, this is the time to do it). After unwrapping the ribs, glaze the ribs with the char siu sauce on both sides and place the ribs back directly on the grate and smoke until the ribs reach a temperature of 190F (approximately 2hrs).
- Remove the ribs from the smoker and let rest for 10 minutes and then slice.
Leftovers???
In the off chance that you have leftovers, you can always try your hand at making char siu baos which are DELICIOUS. You’ve seen them at dim sum restaurants and while somewhat laborious to make, it’s pretty fun if you have some helping hands. If you have leftover ribs, you just need to cut the rib meat off the bones and dice up the meat and throw the leftovers into a sauce pan and add just enough chicken stock to revitalize the rib meat (the sauce should not be too thin and you want the consistency to be like a pulled pork sandwich). This is the best dough recipe I have found and it is pretty forgiving.
August 24, 2020
Roasted Asian Inspired Beet Carpaccio
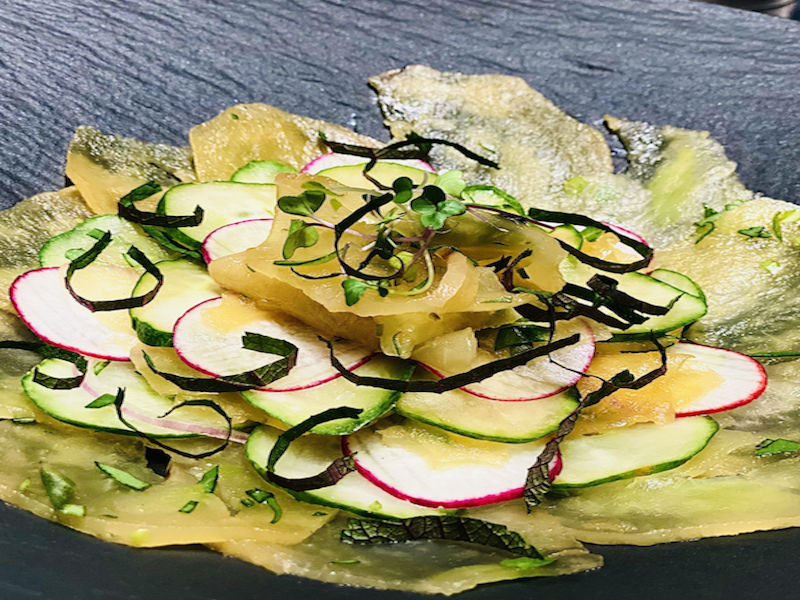
Lorem ipsum dolor sit amet consectetur adipisicing elit. Ad, amet voluptatum reiciendis vero maxime voluptatibus minima consequuntur nulla accusantium nemo distinctio voluptates sed. Fugit sapiente iusto, perferendis, maxime aspernatur eum corrupti deleniti id officia expedita totam odit? Quidem obcaecati, distinctio asperiores quod sint, esse quisquam tenetur, facilis et ea quaerat. Impedit, consequatur, dignissimos qui eos, dolore culpa perspiciatis quisquam inventore repellat odio quo? Architecto culpa libero ipsa maiores! Fugiat neque, et atque est perspiciatis, quaerat rem adipisci doloremque asperiores maiores officiis exercitationem autem quisquam impedit nostrum qui voluptatibus similique quam amet quae quis, quod repellendus maxime praesentium. Eos, repellendus recusandae.
 Sliced Veggies
Roasted Asian Inspired Beet Carpaccio
- Yield: 4 Servings
- Prep: 15 Minutes
- Total: 75 Minutes
Ingredients
The Methodology
- Preheat your oven to 400F. Take your beets and wash them and try to scrub off as much of the dirt as possible and trim off the end of the beet to remove that root and wrap your beet(s) in aluminum foil.
- Once your oven hits 400F, put your beet(s) in the oven and roast them for an hour or until they are fork tender and set the beets aside (you can do this days in advance and the beets will actually keep in the foil for a few days until you’re ready to use them). If you’re in a hurry to get this done you can always throw the beets in the freezer to cool them down quickly.
- After the beets have cooled off, start peeling the skin of the beets. If the skin is hard to peel, just use a paring knife to remove the skin. Also, if you’re using red beets, you may want to put on some disposable gloves so you don’t stain your hands but based on my experience, roasting beets this way has caused minimal staining (but in this case I used golden beets so no problem there).
- Take the beet(s) and thinly slice them using a mandoline or a knife. I sliced them almost paper thin using 1/16 thickness and set aside in a boil and toss the beets with 1 tsp of sesame oil and 1 tsp of soy sauce.
- Now take your English cucumber and thinly slice half of it using a mandoline or knife to about the same thickness as the beet(s). You can use however much of the cucumber based on your personal preference of beet to cucumber ratio. Take your slice cucumbers and put them in a bowl or colander and throw about 1 tbsp of salt on them and let them hang out for about 10 minutes, after that time you’ll notice that the cucumbers are almost sweaty (this is good because you’ll want to get rid of as much moisture as possible for maximum crunchiness). While the cucumbers are sweating it out, you can thinly slice your shallot and your radishes. After about 10 minutes, take a paper towel or kitchen towel and wring the moisture from the cucumbers and place them in a bowl along with your sliced shallots and radishes and add 1 tbsp of soy sauce, 2 tbsp rice wine vinegar, and 1 tbsp sesame oil (you can adjust the amount of soy sauce and vinegar based on personal preference).
- Chiffonade the mint leaves or you can rip them up for a rustic look and add about half to the cucumber mixture and reserve the rest for the garnish. Here is a video on how to do that fancy slicing.
- As for the presentation, you can arrange how I did in the photo by doing alternating layers of beet and cucumber/radish/shallot or you can toss everything together and garnish with the chiffonade mint.
August 22, 2020
Sous vide Ribeye Steak Cap & Potato Pave
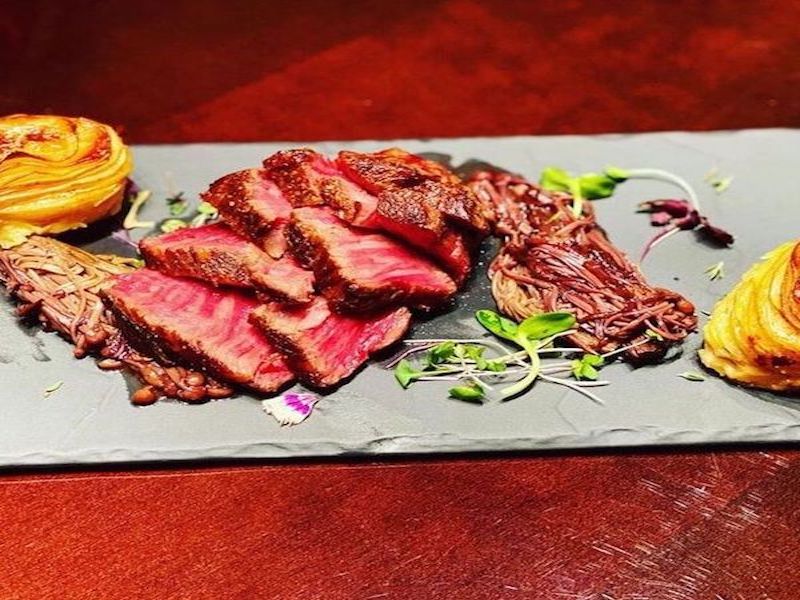
I bought these ribeye steak cap steaks from Snake River Farms and decided this was as good as any time to cook these up and no regrets! This recipe was made for 2 using 1 6oz steak served with farro risotto and mushrooms, and potato pave.
 Steak pre-sous vide
 Steak after sous vide (not pretty)
 Wheat Farro Risotto w/cremini mushrooms
Sous vide Ribeye Steak Cap & Potato Pave
- Yield: 2 Servings
- Prep: 45 Minutes
- Total: 120-240 Minutes
Ingredients
The Methodology
- Take your steak and season it liberally with salt (I used Himalayan salt but any salt will do).
- Add the steak to your food saver bag/sous vide bag (if you don't have this you can always use a ziploc bag and double bag it just in case) and then add the sliced garlic, sprigs of thyme and rosemary and the secret ingredient shhhh---duck fat and then seal the bag.
- Place the bag into your sous vide machine or if you have the sous vide wand, add it to a pot of water with a sous vide wand with the temperature set at 124F for very rare. For cooking times and temperatures, I usually defer here for guidance. I like my steak on the very rare side so you may want to aim at 130 for a medium rare since you will be searing this steak later on.
- Sous vide the steak for about 1 1/2 hours - you could let it go for longer if you're busy prepping other dishes probably probably no longer than 3 hours.
- Take the steak out of the bag and pat dry, set aside while you crank up your stove in order to give your steak a good sear (almost everyone coming out of the sous vide does not have the most appetizing color or texture so this part is imperative). You can either use a cast iron pan or a really good non stick pan to do the sear. When the pan is hot, add about 1 1/2 tbsp of clarified butter (I use clarified butter for the higher smoking and the flavor it imparts (smoking point of clarified butter is 482F compared to the smoking points of butter and canola oil, 302F and 400F, respectively), and then sear your steak for 1 minute on each side for a nice crust on the steak. I also baste the steak in the butter and added the herbs from the sous vide to impart even more flavor. Set the steak aside and wrap loosely in aluminum foil to keep it warm while you work on the wine reduction sauce and turn down the heat on the pan to around a medium, maybe medium low.
- Using the same pan that you seared the steaks, add the sliced shallots and cook for about 1 minute and make sure not to burn them but just to soften them up a bit and then add about 1/2 a package of enoki mushrooms.
- Cook the shallots and mushrooms for about a minute and then add 1 tsp of thick soy sauce or dark soy sauce and then add 1/2 cup of red wine (I used a red Tuscan but you can use whatever red wine that you like to drink that isn't super expensive).
- You just let the wine reduce until it is able to coat the back of a spoon and you're done!
- Chop the cremini mushroom into about quarters and saute in a pan with about 2 tbsp of butter and saute until light brown.
- Add 1/2 cup of farro and brown for about 2 minutes and stir to move the farro around in order to toast it and then add 1/4 cup of sake to the farro and cook until the sake almost evaporates.
- Add 2 tbsp of miso paste and 2 tbsp of thick soy sauce and add 2 cups of chicken stock (or vegetable stock to keep it vegetarian/vegan) and turn the heat down to about a medium to a medium low - you'll want the farro to bubble away but not too vigorously. The wheat farro takes a while to cook and this dish probably took about 1 hour since I kept the heat pretty low. You'll know the farro is down when the farro is al dente and if you run out of chicken stock you just need to keep adding more stock.
- Right when the risotto is done, add about 3 tbsp of heavy cream for some extra richness (or omit in order to make this dish vegetarian/vegan).
- I buy vegetables from a local co-op and had a surplus of small yukon gold potatoes which was the inspiration for this dish. It is better to use russet potatoes as it makes for a better presentation. I used 5 small potatoes but you can use 2 large russet potatoes.
- For this recipe, I left the skin on the potatoes and did not peel them since most of the nutrients of a potato but it is much prettier when you peel the potatoes. Take your potatoes and using a very sharp knife or mandolin (an amazing gadget!), slice the potatoes to about a 1/16 inch thickness.
- Take a baking dish (a loaf pan would work the best, you want a dish that has tall sides because the wow factor of this dish is from the many, many layers of potato) and spray it with cooking oil and start assembling your potato layers.
- Add a thin layer of salt and pepper per 3 layers - it is easy to oversalt these potatoes which is why I only did every 3 layers. Also when assembling the layers, I chose slices of similar widths so each potato unit looked uniform (the benefit of using a large russet potato is that you can cut the slices into rectangles or squares for ease of assembly).
- When you're done assembling, pour enough heavy whipping cream over top of the potatoes just so there is about 1/2 inch of liquid in the pan.
- Bake the potatoes in an oven at 400F for 30 minutes uncovered and then cover it with foil and bake for another 30 minutes.
Wine Pairing

This dish with all the accompaniments is fairly rich and would best pair with a bold red. A bold California cab would have paired best, but alas we did not have any chilled so we went with a Burgundy instead.
My name is Susan and I am a bankruptcy lawyer by day and burgeoning home cook at night. My husband Chris and I love cooking meals at home, sharing bottles of wine together, and hanging out with our dog, Gary (who reaps the fruits of our labor with too many table scraps). This blog is a culmination of the +50 meals that were made during quarantine. Come join us on this culinary adventure. I hope you enjoy!
